
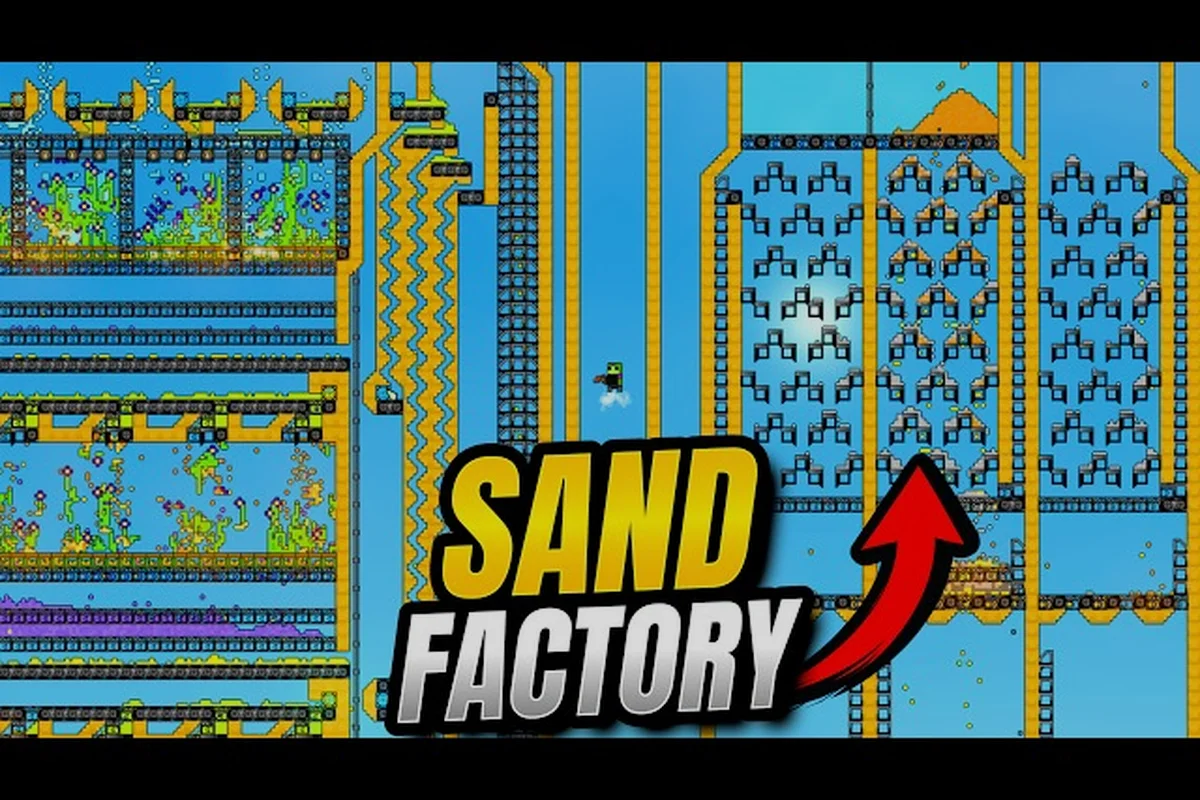
Setting up a Sandustry production chain setup that actually works requires understanding how each pixel-based material behaves before you start placing machines. Unlike traditional factory games where resources flow through pipes and belts, Sandustry simulates every grain of sand, drop of water, and wisp of steam individually, which means your production lines must respect the physical properties of each material rather than forcing them through arbitrary channels. Getting this right matters because a poorly designed chain will back up, stall, or contaminate your outputs, wasting hours of careful planning and leaving you with a tangled mess of half-processed resources instead of a smooth pipeline from raw input to finished product.
The core insight that separates functional Sandustry production chain setup from broken ones is that every pixel behaves independently — sand grains fall, water flows downhill, steam rises, and ice melts — so your factory layout must work with gravity and fluid dynamics, not against them. This guide walks you through building complete production chains for ore processing, gold refinement, sand conversion, and the water-steam loop that powers advanced automation, with concrete layouts and step-by-step instructions you can replicate in your own world. By the end, you will know exactly how to design, troubleshoot, and scale each chain from a handful of raw materials to a fully automated production floor.
Sandustry Production Chain Setup Fundamentals
Before you place a single machine, you need to understand the material state machine that governs how every resource in Sandustry transforms from one form to another. The official Steam page describes the simulation as one where "ice melts to water, water boils to steam that rises and condenses into rain; sand absorbs surrounding water and depletes reservoirs; slag can be burned and processed further" — which gives you the complete lifecycle in a single sentence. Each transformation requires specific conditions, and your production chain setup must create those conditions reliably and repeatably.
The fundamental rule is that heat drives most transformations in Sandustry. When you apply heat to ice, it melts into water; when you apply more heat to water, it boils into steam; when steam cools, it condenses back into water or rain. Similarly, raw ore requires heat or chemical processing to separate usable materials from slag, and sand can be transformed through various processes into more valuable resources. Understanding which heat sources produce which temperature ranges, and how those ranges affect different materials, is the foundation of every efficient chain. Here are the core material transformations you will build your production chain setup around:
-
Ice → Water: Apply heat to ice blocks, which produces liquid water that flows according to gravity and spreads across flat surfaces.
-
Water → Steam: Boil water with high heat, producing steam that rises upward and can be captured or used for power generation.
-
Steam → Rain/Water: Cool steam naturally or deliberately, causing it to condense back into liquid form.
-
Raw Ore → Refined Material + Slag: Process ore through heat or chemical treatment, separating valuable output from waste slag.
-
Sand → Processed Materials: Transform raw sand through various recipes into glass, silicon, or other advanced components.
Planning Your Factory Layout Around Gravity
The single most important design principle for any Sandustry production chain setup is that materials move naturally according to physics, not according to your conveyor layout. Sand falls straight down, water flows downhill and spreads horizontally, steam rises vertically, and ice stays where you place it until it melts. Your factory design must account for these natural movement patterns, which means thinking in three dimensions rather than trying to force everything onto a single flat plane.
The most efficient layouts use vertical stacking to take advantage of gravity. Place your ore input at the top of a tower, let it fall through processing stages, and collect refined output at the bottom. Water-based chains work best with a reservoir at the top and a series of descending channels that let water flow through each processing stage naturally. Steam-based chains are the exception — they need capture chambers above the boiling point, since steam rises and will escape if you do not contain it.
When you plan your factory, always ask yourself where each material wants to go naturally and design your chain to work with that movement rather than against it. A production chain setup that fights gravity will constantly jam, back up, and require manual intervention, while one that embraces physics will run smoothly with minimal oversight.
Understanding Heat Sources and Temperature Control
Every transformation in Sandustry depends on reaching and maintaining specific temperature thresholds, so your production chain setup needs reliable heat management. The game provides several heat sources with different temperature outputs, and choosing the right one for each stage of your chain is critical. Low heat sources might melt ice but never boil water, while high heat sources can vaporize materials you wanted to keep in liquid form.
The key is to match your heat source to your target transformation and use buffers or distance to control temperature gradients. For example, if you need to melt ice without boiling the resulting water, you want a low, steady heat source placed at a distance from the ice, allowing the temperature to drop slightly before it reaches the material. Conversely, if you are trying to produce steam, you want maximum heat applied directly to a contained water source. Community testing suggests that temperature falls off with distance, so you can tune your chain by adjusting how close your heat source sits to the material being processed.
Sandustry Ore Processing Chain: From Raw Ore to Refined Material
The Sandustry ore processing chain is where most players start their industrial journey, because refined materials unlock advanced crafting recipes and more efficient production methods. Raw ore arrives as solid blocks that contain both valuable material and waste slag, and your job is to separate the two efficiently. The basic process involves applying heat to break the ore apart, then using gravity or manual collection to separate the refined material from the slag byproduct.
The most common approach reported by players is a vertical ore tower where raw ore enters at the top, passes through a heated processing chamber, and separates into refined material and slag that fall into different collection areas below. Because refined material and slag have different physical properties — often different densities or behaviors when heated — they naturally separate as they fall, allowing you to collect them independently. This design takes advantage of gravity and the pixel simulation to create a self-sorting processing chain. Here is a step-by-step breakdown of a basic ore processing chain:
-
Input hopper: Place raw ore blocks at the top of your tower, where gravity will feed them into the processing chamber below.
-
Heated processing chamber: Apply heat to break the ore apart, causing refined material and slag to separate. The temperature needs to be high enough to break the ore bond but not so high that it vaporizes the valuable material.
-
Gravity separation zone: Allow the processed materials to fall through a vertical shaft, where differences in density and behavior cause them to separate naturally.
-
Collection area: Place collection points at the bottom of the shaft for both refined material and slag, ensuring they land in separate containers.
Comparing Ore Processing Methods
Different ore types require different processing approaches, and the optimal method depends on the specific material you are refining. Based on community testing and player reports, here is a comparison of common processing methods:
| Ore Type | Processing Method | Temperature Range | Output Ratio | Slag Byproduct |
|---|---|---|---|---|
| Common Ore | Direct Heat | Medium | 60-70% refined | 30-40% slag |
| Dense Ore | Extended Heat | High | 50-60% refined | 40-50% slag |
| Compound Ore | Multi-Stage Heat | Variable | 70-80% refined | 20-30% slag |
| Volatile Ore | Controlled Heat | Low-Medium | 55-65% refined | 35-45% slag |
The output ratios above come from community data and may vary based on your specific setup and the version of the game you are running. Players report that compound ores benefit most from multi-stage processing, where you apply heat in stages rather than all at once, allowing different components to separate at different temperatures. This approach yields higher refined output but requires more complex production chain setup with multiple heat zones.
Handling Slag Waste
Slag is the unavoidable byproduct of every ore processing chain, and how you handle it determines whether your factory runs smoothly or clogs up with waste. The official Sandustry website notes that "slag can be burned and processed further," which means it is not purely waste — it has secondary uses if you build the right processing infrastructure. However, for most players, the immediate concern is preventing slag from accumulating and blocking your production chain setup.
The simplest approach is to route slag to a dedicated collection area where it accumulates until you process it or dispose of it. Because slag behaves differently from refined material — often heavier or less reactive to heat — it naturally separates during the gravity separation phase, so you can collect it independently. Some players report using slag as a secondary heat source by burning it, which both disposes of waste and powers other parts of the factory. This creates a closed-loop system where ore processing waste becomes fuel for other production chains.
Sandustry Gold Processing: Refining the Most Valuable Resource
Sandustry gold processing is the most rewarding production chain in the game because gold unlocks the most advanced crafting recipes and automation options. However, gold ore is rarer and more difficult to process than common ores, requiring a more sophisticated production chain setup that handles its unique properties. Gold behaves differently under heat than other materials — it has a specific melting point and flows in distinctive ways that you can exploit for efficient processing.
The key to successful gold processing is temperature precision. Gold requires a specific heat range to separate from its ore matrix without vaporizing or becoming too fluid to control. Players report that gold ore needs a slower, more controlled heating process than common ores, which means your production chain setup needs finer temperature control rather than simply applying maximum heat. This often requires a multi-stage heating approach where you gradually raise the temperature rather than hitting it with full force immediately. Here is a comparison of gold processing approaches based on community testing:
| Processing Method | Setup Complexity | Gold Yield | Processing Speed | Risk Level |
|---|---|---|---|---|
| Direct Heat | Low | 40-50% | Fast | High (gold loss) |
| Multi-Stage Heat | Medium | 60-70% | Medium | Medium |
| Controlled Gradient | High | 75-85% | Slow | Low |
| Chemical Assisted | Very High | 80-90% | Medium | Low |
The controlled gradient method produces the highest gold yield but requires the most complex production chain setup, with multiple heat zones at carefully calibrated temperatures. Players who have mastered this approach report that the extra setup effort pays off dramatically in gold output, making it the preferred method for serious industrial operations.
Designing a Gold Refining Tower
The optimal gold processing chain uses a vertical tower design with multiple temperature zones, allowing ore to pass through progressively hotter areas as it falls. Raw gold ore enters at the top, where the first zone applies gentle heat to begin breaking the ore matrix. As the material falls, it passes through progressively hotter zones until the gold separates completely from the waste material. The refined gold collects at the bottom while slag routes to a separate collection area.
The critical design consideration is zone spacing and temperature calibration. Each zone needs enough vertical distance to allow the material to reach the target temperature before falling into the next zone, but not so much distance that the material cools down between zones. Community reports suggest that a spacing of roughly 10-15 pixels between heat sources works well for most gold ore types, though you may need to adjust based on your specific ore source and the heat output of your chosen heat source.
Scaling Gold Production
Once you have a working gold processing chain, the next challenge is scaling up production to meet the demands of advanced crafting recipes. The simplest approach is to build multiple parallel processing towers, each handling a portion of your ore input. This provides redundancy — if one tower jams or needs maintenance, the others keep producing — and allows you to expand production incrementally as your ore supply grows.
However, scaling gold production also requires scaling your ore supply, which means expanding your mining operations or establishing trade routes with other players. The Sandustry production chains guide covers the full range of crafting recipes that consume gold, helping you plan how much production capacity you actually need. Many players report that they overbuilt gold processing early on, only to realize that their gold consumption was much lower than expected, so it is worth planning your production targets before committing to a massive expansion.
Sandustry Sand Processing Chain: Transforming the Most Common Resource
The Sandustry sand processing chain is unique because sand is both the most abundant resource in the game and the raw material for some of the most valuable products. The official game description notes that "every pixel behaves individually: sand, snow, seeds, spores and ice chips each simulate independently," which means sand has complex physical behavior that you can exploit for processing. Sand falls, piles up, and interacts with water in distinctive ways, and understanding these behaviors is key to building an efficient processing chain.
The most important sand behavior for production is its interaction with water. The Steam page notes that "sand absorbs surrounding water and depletes reservoirs," which means you can use sand to remove water from an area, or conversely, use water to process sand in specific ways. This interaction is the foundation of several sand processing recipes, where you deliberately combine sand and water under controlled conditions to produce advanced materials. Here is a breakdown of the main sand processing recipes based on community data:
| Input Material | Processing Condition | Output Material | Notes |
|---|---|---|---|
| Raw Sand | High Heat | Glass | Basic sand processing recipe |
| Raw Sand + Water | Controlled Mixing | Wet Sand | Intermediate product |
| Wet Sand | High Heat | Purified Glass | Higher quality output |
| Raw Sand + Chemical | Chemical Treatment | Silicon | Advanced material |
| Sand + Slag | Combined Processing | Composite Material | Uses ore processing waste |
Building a Sand Processing Facility
A sand processing facility needs to handle large volumes of raw sand while maintaining consistent processing conditions. Because sand falls and piles up naturally, you can use gravity-fed hoppers to feed your processing chain without complex transport systems. The main challenge is preventing sand from accumulating in unwanted areas, which can block your facility and interrupt production.
The recommended layout uses a series of descending chambers, where raw sand enters at the top and passes through different processing stages as it falls. Each chamber applies a specific treatment — heat, water mixing, chemical application — and the processed material continues to the next stage. This vertical design takes advantage of sand's natural falling behavior and keeps the entire production chain setup compact and efficient.
Managing Sand and Water Interactions
The sand-water interaction is both a blessing and a curse for production chains. On one hand, it enables several important recipes; on the other hand, uncontrolled sand-water mixing can contaminate your production chain setup and ruin outputs. Players report that sand can absorb water from nearby reservoirs, depleting your water supply and creating wet sand where you wanted dry sand. Managing this interaction requires careful separation between sand processing areas and water storage.
The most effective approach is to isolate water-sensitive processing stages from any water sources, using physical barriers or distance to prevent accidental mixing. If you need to combine sand and water deliberately, use a controlled mixing chamber where you can regulate the ratio and prevent overflow. Some players report using sand itself as a natural barrier — placing dry sand between water sources and sensitive processing areas to absorb any stray water before it reaches the production chain.
Sandustry Water Production and Steam Generation
Sandustry water production is the backbone of many advanced production chains, because water is both a processing input and the raw material for steam generation. The game's simulation includes a complete water cycle — ice melts to water, water boils to steam, steam rises and condenses into rain — and you can tap into this cycle at any point to produce the resource you need. Understanding the full water cycle is essential for building a sustainable production chain setup that does not depend on finite water sources.
The most reliable water production method is ice mining and melting. Ice blocks are abundant in cold regions, and applying heat to them produces clean water without any contamination. This approach gives you direct control over water production rates — more ice input means more water output — and does not depend on weather or environmental conditions. The main challenge is transporting ice from mining areas to your processing facility, which requires either manual hauling or an automated transport system. Here is a comparison of water production methods based on community testing:
| Production Method | Input Resource | Output Rate | Setup Complexity | Reliability |
|---|---|---|---|---|
| Ice Melting | Ice Blocks | High | Low | Very High |
| Steam Condensation | Steam + Cooling | Medium | Medium | High |
| Rain Collection | Weather Dependent | Variable | Low | Low |
| Reservoir Pumping | Natural Water | High | Medium | Medium |
Steam Production and Capture
Sandustry steam production is the most technically demanding part of any production chain setup, because steam rises and escapes unless you contain it properly. The game simulates steam as a gas that rises naturally, which means your steam production facility needs capture chambers above the boiling point to collect the steam before it dissipates. This vertical design requirement makes steam production facilities taller and more complex than other processing chains.
The basic steam production chain is straightforward: boil water with high heat, capture the rising steam, and route it to wherever you need it. The challenge is maintaining a steady water supply to the boiling chamber while capturing all the steam produced. Players report that the most reliable design uses a water reservoir above the boiling chamber, with a controlled feed that maintains a consistent water level. The steam rises into a capture chamber above, where it can be routed through pipes or channels to your processing equipment.
Integrating Water and Steam into Your Production Chain
The water-steam cycle creates a closed-loop opportunity for advanced production chains. Steam that you use for processing or power generation can be cooled and condensed back into water, which you can then recycle into your water supply. This dramatically reduces your dependence on external water sources and makes your production chain setup more sustainable in the long run.
The key to a successful closed-loop system is careful temperature management. You need to cool the steam enough to condense it back into water, but not so much that you waste the energy you put into boiling it in the first place. Some players report using the waste heat from their ore processing chains to boil water, creating an integrated system where one production chain's waste becomes another chain's input. This kind of cross-chain integration is the hallmark of an advanced Sandustry production chain setup, and it is worth planning for from the start.
Optimizing Your Production Chain Setup
Once you have the basic production chains working, the next step is optimizing each chain to maximize output, minimize waste, and reduce manual intervention. The difference between a functional production chain setup and an optimized one is often substantial — players report that optimized chains produce two to three times more output than basic designs using the same input resources. The optimization process involves analyzing each stage of your chain, identifying bottlenecks, and redesigning to eliminate them.
The most common bottleneck in Sandustry production chains is material transport between stages. Because materials move according to physics rather than conveyor belts, you need to design your chain so that materials naturally flow from one stage to the next without getting stuck. This often means adjusting the vertical spacing between stages, adding guide walls to direct material flow, or redesigning collection areas to prevent pile-ups. Here are the key optimization strategies reported by experienced players:
-
Eliminate manual collection: Design your chain so that processed materials automatically route to storage or the next processing stage, eliminating the need for manual intervention.
-
Balance stage throughput: Ensure that each stage of your chain can handle the output of the previous stage, preventing bottlenecks where material accumulates.
-
Use gravity effectively: Design vertical chains that let materials fall naturally between stages, reducing the need for transport mechanisms.
-
Recycle waste products: Route slag and other byproducts to secondary processing chains or use them as fuel, turning waste into additional value.
-
Add buffer capacity: Include buffer areas between stages to absorb fluctuations in input or output, preventing chain stalls during temporary imbalances.
Measuring and Improving Chain Efficiency
To optimize your production chain setup, you need to measure its efficiency — the ratio of valuable output to total input. This requires tracking both your input resource consumption and your output production over time, which you can do manually or with automated monitoring tools. Players report that most basic chains operate at 50-70% efficiency, while optimized chains reach 80-90% or higher.
The most effective way to improve efficiency is to identify and eliminate waste points in your chain. Common waste sources include materials that fall into the wrong collection area, slag that contaminates refined output, and heat that escapes without processing material. Each of these waste points represents lost production that you can recover with targeted design changes. Community testing suggests that the biggest efficiency gains come from fixing material routing issues, which often account for more than half of all waste in a typical production chain setup.
Scaling to Full Automation
The ultimate goal for many players is full automation — a production chain setup that runs continuously without any manual intervention. This requires not only optimized processing chains but also automated material transport, storage, and system monitoring. The automated production guide covers the full range of automation options, from simple sorting systems to complex multi-chain factories.
The transition from manual to automated production is incremental. Start by automating the most tedious parts of your chain — material collection and transport — then move on to automating processing stages and finally system monitoring. Each automation step reduces the time you spend managing your factory and frees you up to focus on expansion and optimization. Players who have fully automated their production chains report that they can run their factories for hours without any intervention, producing valuable materials continuously while they focus on other aspects of the game.
Common Production Chain Setup Mistakes
Even experienced players make mistakes when designing production chains, and understanding the most common failure modes can save you hours of troubleshooting. The collecting resources guide covers the basics of gathering raw materials, but the production chain setup itself has its own set of pitfalls. Based on community reports, these are the most frequent mistakes and how to avoid them:
-
Ignoring gravity: Designing flat chains that fight natural material movement, causing constant jams and requiring manual intervention.
-
Overheating materials: Applying too much heat and vaporizing valuable materials instead of processing them, reducing your output yield.
-
Mixing incompatible materials: Allowing sand and water to mix unintentionally, contaminating your processing chain and ruining outputs.
-
Insufficient collection capacity: Building collection areas too small for your production volume, causing materials to pile up and block the chain.
-
No buffer capacity: Designing chains without buffer areas, so any fluctuation in input causes the entire chain to stall.
Troubleshooting Chain Failures
When your production chain setup stops working, the first step is to identify where the failure occurred. Work backward from the output — if no material is coming out, check the last processing stage; if material is backing up, check the stage where the accumulation started. Most chain failures are caused by a single blocked stage rather than a systemic problem, and fixing that one blockage often restores the entire chain to working order.
The most common failure point is material accumulation at collection points. When a collection area fills up, it stops accepting new material, which backs up the entire chain. The fix is either to increase collection capacity, automate material removal from collection areas, or add overflow routes that redirect excess material to secondary storage. Players report that adding overflow capacity to every collection point dramatically reduces chain failures and makes the entire production chain setup more resilient.
When to Rebuild vs. Repair
Sometimes a production chain setup is so fundamentally flawed that repairing it is more work than rebuilding it from scratch. The key indicator is whether the chain's design works with or against physics. If your chain constantly fights gravity, requires manual intervention, or has materials going to the wrong places, the design is likely flawed and a rebuild will save you time in the long run. Conversely, if the chain works most of the time and only fails during unusual conditions, targeted repairs are usually sufficient.
Before rebuilding, consider whether you can salvage parts of the existing chain. Processing chambers, heat sources, and collection areas are often reusable even if the material routing between them is flawed. By preserving the working components and redesigning only the broken connections, you can rebuild your production chain setup faster and with less resource investment than starting from zero.
Frequently Asked Questions
What is the best starting production chain setup for beginners?
The best starting setup is a basic ore processing tower with a single heat source and gravity-based separation. This chain is simple to build, requires minimal resources, and teaches you the core principles of Sandustry production chain setup without overwhelming complexity. Start with common ore and expand to gold processing once you understand the fundamentals.
How do I prevent sand from contaminating my water production?
Keep your sand processing and water production areas physically separated, with at least 20-30 pixels of buffer space between them. Use dry sand as a natural barrier around water reservoirs, since sand absorbs surrounding water and will prevent it from spreading. If contamination occurs, remove the wet sand immediately and rebuild the barrier with fresh dry sand.
What temperature should I use for gold ore processing?
Gold ore requires a controlled gradient rather than maximum heat. Start with low heat to break the ore matrix, then gradually increase temperature as the material falls through your processing tower. Community testing suggests that a gradient from low to medium-high heat across 3-4 zones produces the best gold yield without vaporizing the valuable material.
Can I recycle steam back into water for my production chain?
Yes, steam condensation is a viable water source. Capture steam in an enclosed chamber and allow it to cool naturally, or use a cooling element to accelerate condensation. The recycled water can feed back into your water reservoirs, creating a closed-loop system that reduces your dependence on external water sources.
How many processing towers do I need for a full automation setup?
The number depends on your production targets and ore supply. Most players start with one tower per material type and expand as demand grows. A good rule of thumb is to build one additional tower for every 50% increase in target production, providing redundancy and preventing bottlenecks during peak demand periods.