
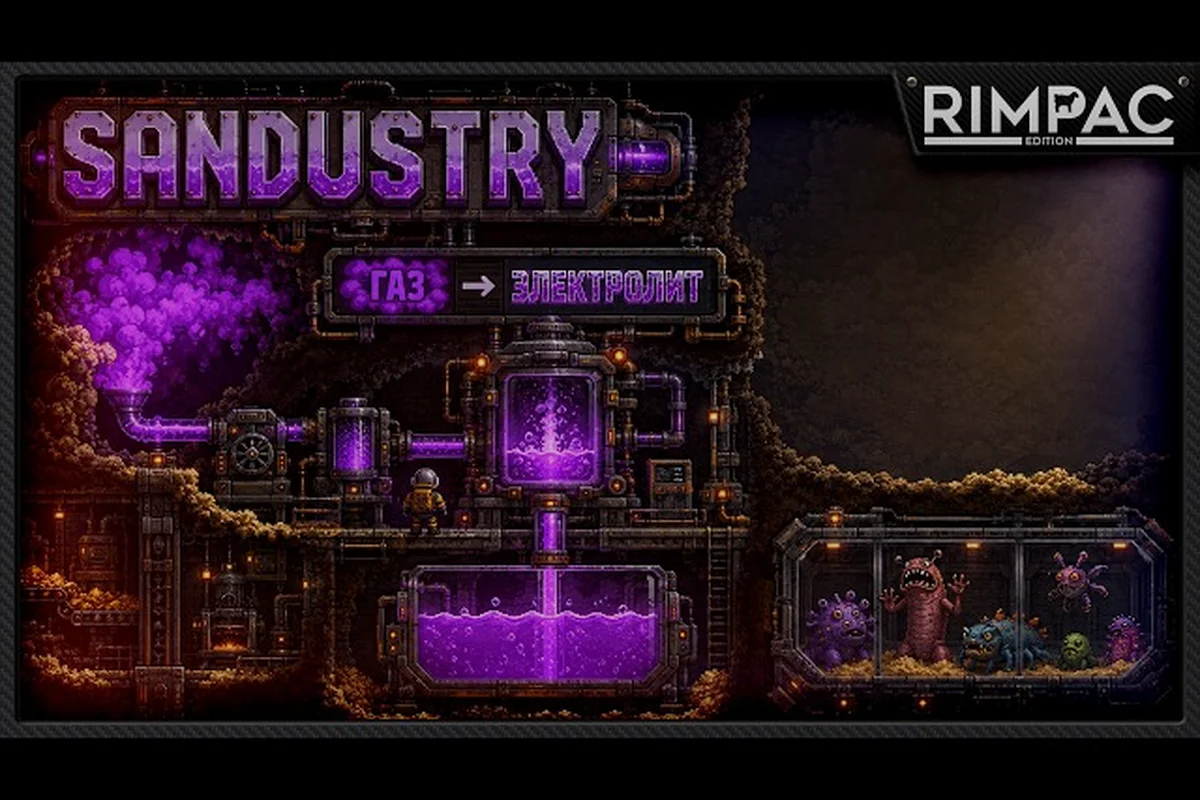
Understanding the Sandustry raw materials ecosystem is the single biggest difference between a factory that stalls and one that scales. Every pixel in this sand-physics factory game behaves individually, which means sand, snow, seeds, spores, and ice chips each simulate independently rather than acting as a uniform block. Because of this granular simulation, your resource collection strategy must account for how materials physically interact, not just what recipes demand. This guide breaks down every material type, where it spawns, how to process it, and which farming routes deliver the best return on your time investment. By the end, you will know exactly which deposits to prioritize and which processing chains deserve your early automation efforts.
Sandustry Raw Materials Overview: The Complete Resource Map
The world of Sandustry runs on a handful of core Sandustry crafting materials, and each one behaves differently under the pixel simulation. According to the official game description on the Sandustry website, every pixel behaves individually, so sand grains fall, water flows, steam rises, and spores spread based on physical rules rather than scripted events. This means your farming approach needs to respect the physics of each material, because a grabber that works perfectly for sand might fail completely when you point it at water or ice chips. Here is the full breakdown of every material currently available in the game, based on the official Sandustry Steam page and community reports: The table columns are: Material, Spawn Location, Primary Use, Processing Required.
| Material | Spawn Location | Primary Use | Processing Required |
|---|---|---|---|
| Sand | Surface deserts, large deposits | Foundation, glass production, gold sifting | Minimal, direct collection |
| Gold | Rare veins, sifted from sand | High-value crafting, advanced machines | Sifting or direct mining |
| Ice | Cold biomes, frozen lakes | Water source, cooling systems | Melting required |
| Water | Lakes, melted ice, condensation | Hydration, steam generation, seed growth | Pumping or melting |
| Slag | Byproduct of smelting and burning | Fuel source, further processing | Burning or refining |
| Seeds | Plant matter, organic deposits | Growing new sand sources, biomass | Planting and harvesting |
| Spores | Underground caverns, fungal areas | Specialized crafting, spreading mechanics | Controlled collection |
Each of these Sandustry raw materials plays a distinct role in your factory progression, and understanding their physical behavior is critical. Sand absorbs surrounding water and depletes reservoirs, which means you cannot simply dump sand into a water source without consequences. Ice melts into water, water boils into steam that rises and condenses into rain, creating a full water cycle that you can exploit for infinite water generation. Slag can be burned and processed further, making it a valuable byproduct rather than waste. Seeds and spores spread under the right conditions, which opens up passive farming opportunities if you design your base around their growth mechanics.
Sand and Gold: The Foundation of Sandustry Material Farming
Sand is the most abundant and versatile Sandustry crafting material in the game, serving as the backbone of nearly every early production chain. You will find it in massive surface deposits that are easy to collect with basic grabbers, and because sand grains simulate individually, you can extract them at a steady rate without worrying about depleting a solid block. The key insight is that sand absorbs surrounding water, so positioning your sand collection near a water source requires careful planning to avoid accidentally converting your sand into saturated, heavier material that behaves differently.
Gold, on the other hand, is the material that every player obsesses over, and for good reason. The Sandustry best way to get gold is not always obvious to new players, because gold appears in two distinct forms: rare veins that you can mine directly, and trace amounts that you can sift out of ordinary sand. Community testing suggests that sifting sand yields a small but consistent trickle of gold, while direct mining of veins provides larger bursts but requires you to locate the deposits first. For a deeper breakdown of this process, check out our complete guide on how to get gold, which covers vein locations and sifting efficiency in detail.
Direct Mining vs. Sand Sifting
When you are deciding how to approach Sandustry gold farming, you need to weigh the pros and cons of each method. Direct mining gives you immediate, concentrated returns but requires exploration to find veins, and those veins are finite resources that deplete over time. Sand sifting provides a renewable source of gold because sand deposits are abundant and regenerate through natural processes, but the yield per unit of sand is much lower. Most experienced players recommend a hybrid approach: sift sand continuously as a baseline income, then switch to direct mining when you discover a rich vein.
| Method | Yield per Hour | Setup Cost | Sustainability |
|---|---|---|---|
| Direct Mining | High, bursty | Low, just a grabber | Finite, depletes veins |
| Sand Sifting | Low, consistent | Medium, sifter machine | Renewable, infinite |
| Hybrid Approach | Moderate, steady | High, both systems | Best long-term |
The hybrid approach is the Sandustry best way to get gold for most players because it smooths out the resource curve. You maintain a steady trickle from sifting while hunting for veins to supplement your income, and when you find a rich deposit, you can temporarily boost your production. According to community reports, players who rely solely on sifting progress slower but never hit a hard wall, while those who chase only veins often find themselves waiting for new deposits to spawn.
Automating Your Sand Collection
Once you understand the basics of Sandustry resource farming, the next step is automation. A well-placed grabber can collect sand continuously, but you need to think about the conveyor path and storage capacity to avoid bottlenecks. Because sand grains simulate individually, a single grabber can process a surprisingly large volume, but your storage silo will fill up fast if you do not have a processing chain downstream. Pair your sand collection with a sifter and a gold storage unit to create a fully automated Sandustry gold farming line that runs while you explore or build other infrastructure.
Ice, Water, and the Liquid Cycle in Sandustry
Ice and water form the second pillar of Sandustry raw materials, and their behavior is governed by a complete thermodynamic cycle that the developers implemented in the simulation. According to the official simulation rewrite video, water flows, ice melts, steam rises, and condensation creates rain, which means you can build systems that recycle water indefinitely. This is a game-changing mechanic because it turns a finite-looking resource into an infinite one if you design your base correctly.
The Sandustry material farming potential of the water cycle is enormous, but it requires understanding how each state transition works. Ice melts into water when exposed to heat, water boils into steam when heated further, and steam rises until it cools and condenses into rain that falls back down. You can exploit this cycle by creating a closed chamber where you boil water, capture the steam, condense it, and collect the resulting rain. Community testing suggests this method produces a steady supply of water without requiring external sources, making it ideal for desert bases where surface water is scarce.
Melting Ice Efficiently
Ice is the most convenient source of water in cold biomes, but melting it efficiently requires the right setup. The physics simulation means that ice chips melt individually, so a large ice block takes time to fully convert, and the melting rate depends on the heat source you apply. Players have reported that placing ice near furnaces or other heat-generating machines speeds up the process considerably, while ice left in cold areas may never melt at all. For a detailed walkthrough of the best melting setups, see our guide on how to melt ice, which covers heat sources, placement strategies, and common mistakes.
| Heat Source | Melting Speed | Energy Cost | Best Use Case |
|---|---|---|---|
| Ambient Warmth | Very slow | None | Passive melting, not practical |
| Furnace Proximity | Fast | Fuel required | Active melting, reliable |
| Direct Heat Pipes | Very fast | High fuel cost | Industrial-scale melting |
The choice of melting method depends on your stage of progression and available resources. Early on, you might rely on ambient warmth or furnace proximity because you lack the infrastructure for direct heat pipes. Later, when you have a steady fuel supply from slag or other sources, direct heat pipes become the Sandustry best way to get gold of the water world, providing rapid conversion rates that keep your production lines running.
The Steam and Rain Loop
The most advanced water strategy involves creating a closed steam and rain loop that produces water indefinitely. This requires a sealed chamber with a heat source at the bottom, a collection area at the top, and a way to channel the condensed rain back into your storage. According to the official game description, steam rises and condenses into rain, which means the physics naturally supports this kind of recycling system. Players who master this loop report that they never need to hunt for water sources again, freeing up exploration time for other Sandustry raw materials like gold and spores.
Slag, Seeds, and Spores: The Underrated Sandustry Crafting Materials
While sand and gold get most of the attention, slag, seeds, and spores are the Sandustry crafting materials that enable advanced production chains. Slag is a byproduct of smelting and burning processes, and while it might seem like waste, it can be burned as fuel or processed further into useful materials. The official Sandustry Steam page confirms that slag can be burned and processed further, which makes it a valuable secondary resource rather than something to discard. Community reports suggest that a well-managed slag recycling system can supply a significant portion of your fuel needs, reducing your dependence on external fuel sources.
Seeds and spores behave differently from other materials because they are living organisms that spread under the right conditions. Seeds grow into new sand sources when planted in suitable soil, while spores spread through underground caverns and fungal areas. This growth mechanic opens up passive farming opportunities, because you can create a dedicated growing area where seeds and spores reproduce on their own, providing a steady supply without active collection. For a deeper dive into these organic resources, check out our snow collection and organic farming guide, which covers seed farming and spore collection strategies in detail.
| Material | Growth Condition | Yield per Cycle | Automation Potential |
|---|---|---|---|
| Seeds | Moist soil, warm temperature | Moderate | High, self-sustaining |
| Spores | Dark, humid caverns | Low, spread slowly | Medium, requires monitoring |
| Slag | Produced by smelting | Depends on input | High, automatic byproduct |
The key to maximizing these Sandustry raw materials is understanding their production conditions and designing your base to support them passively. Seeds need moisture and warmth, so placing them near your water recycling system creates an ideal growing environment. Spores prefer dark, humid areas, so underground chambers or covered sections of your base work best. Slag requires smelting operations, so integrating it into your main production line ensures a constant supply without extra effort.
Burning Slag for Fuel
Slag is an excellent fuel source because it is produced as a byproduct of other operations, meaning you get it for free while doing something you would do anyway. The burning process converts slag into energy that can power furnaces, heat pipes, and other machines, and the official demo trailer shows players burning residue to generate power. According to community testing, slag burns efficiently and produces a steady flame, making it a reliable fuel for continuous operations. The key is to maintain a balance between slag production and consumption, because if you burn it faster than you produce it, you will run out and need to supplement with other fuels.
Passive Seed and Spore Farming
The most efficient way to farm seeds and spores is to create conditions where they reproduce naturally, eliminating the need for constant manual collection. For seeds, this means establishing a moist, warm growing area with plenty of space for new plants to emerge. For spores, you need a dark, humid chamber that mimics their natural underground habitat. Once these areas are established, the materials will spread on their own, and you can collect the surplus at your leisure. This passive approach to Sandustry material farming is ideal for players who want to focus on other aspects of the game while their organic resources accumulate.
Sandustry Resource Farming Strategies and Automation
Now that you understand each material individually, it is time to think about Sandustry resource farming as a complete system. The most efficient factories treat material collection as an integrated pipeline rather than separate operations, because the byproducts of one process often feed into another. Slag from smelting powers your furnaces, which melt ice into water, which irrigates your seed farms, which produce more sand for sifting, which yields gold for advanced crafting. This circular approach maximizes efficiency and minimizes waste, and it is the strategy that separates top players from casual builders.
The Sandustry best way to get gold fits into this larger ecosystem as one node in a comprehensive network. You do not just sift sand in isolation; you sift sand that comes from your seed farms, using water from your ice melting operation, powered by fuel from your slag burning. Every part of the system supports the others, creating a self-sustaining loop that grows more efficient over time. According to community reports, players who design their bases around these interconnections progress significantly faster than those who treat each material as a separate problem.
Step-by-Step Automation Blueprint
-
Building a fully automated Sandustry raw materials processing line requires careful planning and the right machines. The best machines guide covers grabber upgrades and hydro sponge upgrades in detail, but here is a basic blueprint to get you started: Step 1: Sand Collection — Place a grabber at the edge of a sand deposit, with a conveyor leading to your sifter. Make sure the grabber has line of sight to the sand grains so it can collect them efficiently.
-
Step 2: Sifting — Feed the sand into a sifter machine that separates gold particles from the bulk material. The sifter output should split into two paths: gold to storage, and processed sand to your building material stockpile.
-
Step 3: Water Integration — Route excess water from your ice melting operation to the sand collection area. The water helps keep the sand moist, which can improve sifting efficiency and support seed growth nearby.
-
Step 4: Slag Recycling — Connect your smelting operation's slag output to your fuel storage. This ensures a constant fuel supply for your furnaces and heat pipes without requiring external fuel sources.
-
Step 5: Organic Farming — Establish a seed and spore growing area near your water source. The moisture from your water system creates ideal conditions, and the resulting organic materials feed back into your production chains.
This blueprint creates a closed-loop system where every output feeds another process, minimizing waste and maximizing efficiency. The exact layout will vary based on your base location and available space, but the principles remain the same across all playthroughs.
Efficiency Metrics and Optimization
To truly optimize your Sandustry material farming, you need to track key efficiency metrics and adjust your setup accordingly. Community data suggests that most players start with a collection efficiency below 50 percent, meaning they waste more than half of the available material due to poor grabber placement or conveyor routing. By monitoring your throughput and identifying bottlenecks, you can steadily improve your efficiency to 80 percent or higher.
| Metric | Beginner Average | Optimized Target | Key Improvement |
|---|---|---|---|
| Sand Collection Rate | 40-50% | 75-85% | Better grabber placement |
| Gold Sifting Yield | 30-40% | 60-70% | Moisture control, sifter upgrades |
| Water Recycling Rate | 20-30% | 70-80% | Sealed steam loop |
| Slag Fuel Efficiency | 50-60% | 80-90% | Proper burning chamber |
The biggest gains come from fixing the most obvious bottlenecks first. If your sand collection rate is low, move your grabbers closer to the deposit and ensure they have clear access to the grains. If gold yield is poor, check whether your sand is too dry or too wet, because both extremes reduce sifting efficiency. Water recycling improvements require more substantial infrastructure changes, but the payoff is significant because it eliminates your dependence on external water sources.
Advanced Sandustry Material Processing Chains
Once you have mastered basic collection, you can move on to advanced Sandustry crafting materials processing chains that unlock higher-tier recipes and machines. These chains typically involve multiple conversion steps, where raw materials pass through several machines before becoming usable components. The crafting recipes list provides a comprehensive overview of all available conversions, but here are the most important advanced chains to prioritize.
The first advanced chain involves converting sand into glass through high-temperature processing. This requires a furnace capable of reaching the necessary heat, and the resulting glass is used in advanced machines and building components. The second chain involves processing spores into specialized compounds that are essential for certain high-tier recipes. These compounds cannot be obtained through any other method, making spore farming a critical activity for late-game progression. The third chain involves refining slag into a purified fuel that burns more efficiently than raw slag, providing a significant boost to your energy production.
| Processing Chain | Input Materials | Output Products | Complexity |
|---|---|---|---|
| Sand to Glass | Sand, heat source | Glass, building materials | Low |
| Spore Compounds | Spores, water, heat | Specialized crafting components | Medium |
| Slag Refinement | Slag, heat, water | Purified fuel, industrial materials | High |
Each of these chains requires specific machines and careful temperature control, which means you need to plan your base layout to accommodate the necessary infrastructure. The payoff is substantial, because advanced materials unlock recipes that dramatically increase your production capacity and open up new building options. According to community reports, players who invest in these chains early gain a significant advantage in the mid-game, when resource demands start to outpace simple collection methods.
Temperature Control and Material Quality
One of the most overlooked aspects of Sandustry raw materials processing is temperature control. Different materials require different temperatures to process correctly, and getting the temperature wrong can ruin a batch or produce low-quality output. Sand needs moderate heat to become glass, but too much heat can cause it to melt into a useless puddle. Spores require gentle, consistent warmth to produce compounds, while slag needs intense heat to refine properly. Mastering temperature control across your various processing chains is the key to producing high-quality materials consistently.
Scaling Your Production
As your factory grows, you will need to scale your Sandustry resource farming operations to keep up with demand. This means adding more grabbers, expanding your conveyor network, and increasing your storage capacity. The challenge is that scaling one part of the system often creates bottlenecks elsewhere, so you need to expand holistically rather than focusing on a single operation. Community reports suggest that the most successful players plan their expansions in phases, adding capacity to the most constrained part of their system first, then addressing the next bottleneck that emerges.
Frequently Asked Questions
What is the best way to get gold in Sandustry?
The Sandustry best way to get gold is to combine direct mining of rare veins with continuous sand sifting. Direct mining provides large bursts of gold when you find veins, while sifting offers a steady, renewable trickle. Most experienced players run both systems simultaneously to smooth out their gold income.
How do I melt ice efficiently?
Place ice near furnaces or direct heat pipes to speed up melting, because the pixel simulation means ice chips melt individually based on surrounding temperature. Direct heat pipes provide the fastest melting rates but require significant fuel. For a detailed breakdown, see our ice melting guide.
Can I farm seeds and spores passively?
Yes, seeds and spores reproduce under the right conditions, so you can create dedicated growing areas where they spread naturally. Seeds need moist, warm soil, while spores prefer dark, humid caverns. Once established, these areas produce materials continuously without active collection.
What should I do with slag?
Slag is a valuable byproduct that you can burn as fuel or refine into purified materials. Burning slag powers furnaces and heat pipes, while refinement produces higher-quality fuel that burns longer. Integrate slag recycling into your main production line early, because it turns waste into a steady energy source and reduces how much raw ore you need to mine.
How many raw materials are there in Sandustry?
Sandustry has seven raw materials: sand, gold, ice, water, slag, seeds, and spores. Each reacts uniquely in the pixel simulation—ice melts, spores spread, slag solidifies—so your farming setup must adapt. Prioritize water early, since it unlocks seed growth and slag cooling for efficient loops.