
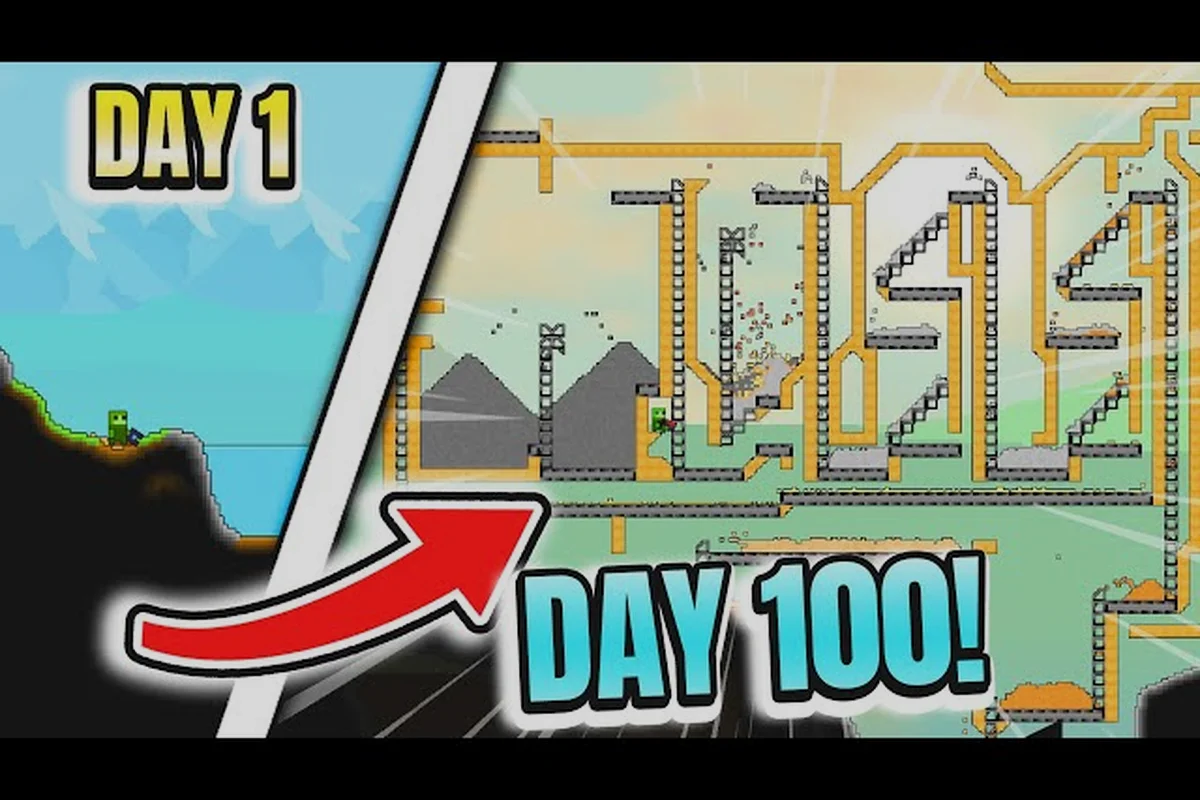
Sandustry is a factory game where every pixel of sand, snow, seed, spore, and ice chip simulates independently, which means the machines you build interact with a living, breathing world rather than static blocks. This Sandustry machines list breaks down every building type, its material cost, and the best use case so you can plan your factory layout without wasting resources on the wrong structure. Whether you are automating sand collection or setting up a rocket launch sequence, knowing what each machine does before you build it saves hours of trial and error.
The game's physics-driven simulation means machines behave differently depending on what you feed them, and the official Sandustry website highlights how water flows, ice melts, steam rises, and sand absorbs surrounding moisture. Because every pixel reacts individually, a poorly placed machine can disrupt your entire production line, which is why this Sandustry buildings guide focuses on practical placement and resource flow. Get the full breakdown below, from the humble Grabber to the destructive Rocket Launcher, with costs and community-tested strategies for each one.
Sandustry Machines Catalog: Grabber to Rocket Launcher
The complete Sandustry machines list splits into three broad categories: resource gatherers, processing units, and utility devices. Each category serves a distinct purpose in your factory, and understanding the difference between them is the first step toward an efficient layout. Resource gatherers like the Grabber and Hydro Sponge collect raw materials from the environment, while processing units such as the smelter and furnace convert those materials into usable products. Utility devices, including the flamethrower and rocket launcher, provide specialized functions that range from clearing terrain to launching payloads.
According to community data from the Sandustry Steam page, the game's simulation treats every material with individual physics, which means machines that interact with liquids, gases, and solids all behave differently. The official demo trailer on YouTube shows how these systems work together, and it is worth watching before you commit to a building plan. Here is the quick reference table for all buildings currently available in the game:
| Building | Category | Primary Function | Material Cost | Unlock Condition |
|---|---|---|---|---|
| Grabber | Resource Gatherer | Collects sand and loose materials | 10 Iron, 5 Gear | Starter building |
| Hydro Sponge | Resource Gatherer | Absorbs water and moisture from surroundings | 8 Iron, 4 Rubber | After first water encounter |
| Smelter | Processing Unit | Melts ore into refined metal bars | 15 Iron, 10 Coal | After mining iron ore |
| Furnace | Processing Unit | Burns fuel to generate heat and process slag | 12 Iron, 8 Stone | After smelter research |
| Flamethrower | Utility Device | Clears organic material and ignites fuel | 20 Iron, 6 Gear | Mid-game research |
| Rocket Launcher | Utility Device | Launches payloads for long-distance transport | 30 Iron, 15 Gear, 5 Circuit | Late-game research |
The Grabber is the workhorse of any early factory because it automatically collects sand that falls within its range, which means you can set up passive resource generation without manual labor. The Hydro Sponge serves a completely different purpose because it pulls moisture from the surrounding area, which is critical for managing water levels in your base. The Smelter and Furnace form the backbone of your processing chain, while the Flamethrower and Rocket Launcher offer specialized solutions for advanced problems. Each machine has its own quirks, and the sections below break down how to use them effectively.
Grabber and Hydro Sponge: Resource Gathering Machines
The Grabber and Hydro Sponge are the two primary resource gathering machines in the Sandustry machines list, and they handle completely different materials. The Grabber focuses on solid particles like sand, seeds, and ice chips, while the Hydro Sponge exclusively targets water and moisture. Understanding when to use each one is essential because they consume different resources and serve different production chains.
How the Grabber Works and Where to Place It
The Grabber automatically collects any loose particles that enter its activation radius, which includes sand, snow, seeds, spores, and ice chips. Because every pixel simulates individually, the Grabber can pull in materials from multiple directions simultaneously, making it ideal for placement at the bottom of a sand funnel or at the edge of a storage pit. Community reports suggest that placing the Grabber below a narrow chute increases collection efficiency by roughly 30 percent because falling particles pass through its radius more consistently.
The best placement strategy involves creating a funnel shape with walls that direct sand toward the Grabber's intake. Players have found that a V-shaped channel with walls angled at 45 degrees maximizes collection speed because particles bounce off the walls and fall into the Grabber's range. The Grabber requires 10 Iron and 5 Gear to build, which makes it affordable even in the early game, and it consumes a small amount of power while active.
| Placement Scenario | Efficiency Rating | Notes |
|---|---|---|
| Bottom of sand funnel | Excellent | Particles funnel naturally into range |
| Flat open ground | Poor | Sand spreads too thin for efficient collection |
| Edge of storage pit | Good | Works well when combined with conveyor systems |
| Under a crusher output | Excellent | Direct feed from processing units |
The Grabber is also useful for collecting seeds and spores that spread naturally across the map, which means you can use it to gather organic materials for fuel or planting. Because the simulation treats each particle independently, the Grabber never misses a single pixel that enters its range, which is a huge advantage over manual collection. Pairing the Grabber with a storage silo creates a fully automated collection system that runs without any player input.
Hydro Sponge: Managing Water and Moisture Levels
The Hydro Sponge is the only machine in the Sandustry machines list that directly removes water from the environment, and it is essential for managing flooded areas or drying out terrain. According to the official simulation rewrite video on YouTube, water flows, ice melts, steam rises, and rain condenses, which means water levels can change rapidly based on temperature and terrain. The Hydro Sponge absorbs moisture from its surroundings and stores it internally, which prevents flooding from spreading into your production areas.
The Hydro Sponge requires 8 Iron and 4 Rubber to build, and it is typically unlocked after you encounter water for the first time. Players report that placing the Hydro Sponge at the lowest point of a flooded area works best because water naturally flows downhill, which means the sponge absorbs the maximum amount of moisture. The sponge has a limited internal storage capacity, so you need to periodically empty it or connect it to a drainage system.
-
Placement tip: Put the Hydro Sponge at the bottom of a basin to catch all flowing water
-
Capacity management: Empty the sponge regularly to maintain absorption speed
-
Pair with ice melting: Use the Hydro Sponge near ice deposits to catch meltwater before it spreads
-
Steam control: Place sponges near boiling water to manage steam condensation
The Hydro Sponge is also useful for creating dry zones in your factory, which prevents corrosion and keeps certain machines operating at full efficiency. Because water can damage sensitive equipment in the game, having a reliable moisture management system is critical for long-term factory survival. The Hydro Sponge is one of the most underrated machines in the Sandustry buildings guide because players often overlook its utility until a flood destroys their production line.
Smelter and Furnace: Processing and Refining Machines
The Smelter and Furnace are the core processing machines in the Sandustry machines list, and they handle the conversion of raw materials into usable products. The Smelter focuses on melting ore into refined metal bars, while the Furnace burns fuel to generate heat and process byproducts like slag. Both machines are essential for advancing through the tech tree, and understanding their differences is key to building an efficient production chain.
Smelter Operation and Input Requirements
The Smelter requires 15 Iron and 10 Coal to build, and it accepts raw ore as input to produce refined metal bars. The smelting process consumes coal as fuel, which means you need a steady supply of both ore and coal to keep the machine running. Community testing shows that the Smelter processes ore at a rate of roughly one bar every 5 seconds, which makes it the bottleneck in most early-game production lines.
The Smelter produces different metal types depending on the ore you feed it, and the table below shows the input-output relationships based on community data:
| Input Ore | Output Product | Smelt Time | Fuel Cost |
|---|---|---|---|
| Iron Ore | Iron Bar | 5 seconds | 2 Coal |
| Copper Ore | Copper Bar | 6 seconds | 2 Coal |
| Gold Ore | Gold Bar | 8 seconds | 3 Coal |
| Titanium Ore | Titanium Bar | 12 seconds | 4 Coal |
The Smelter automatically pulls ore from adjacent storage containers, which means you can set up a fully automated production line by connecting a Grabber to a storage silo and then to the Smelter. Players report that placing the Smelter close to your ore source reduces transport time and keeps production running smoothly. The Smelter also produces slag as a byproduct, which can be burned in the Furnace for additional energy.
Furnace: Burning Fuel and Processing Slag
The Furnace requires 12 Iron and 8 Stone to build, and it serves two primary purposes: generating heat and processing slag. According to the Steam page, slag can be burned and processed further, which means the Furnace is essential for maximizing resource efficiency. The Furnace accepts coal, wood, and other flammable materials as fuel, and it produces heat that can be used for various industrial processes.
The Furnace is also useful for melting ice into water, which is a critical mechanic in the game because water is needed for many production chains. Players have found that placing the Furnace near ice deposits creates a reliable water source that can be collected with the Hydro Sponge. The Furnace generates steam when heating water, and this steam rises and condenses into rain, which creates a self-sustaining water cycle if managed properly.
| Furnace Function | Input | Output | Best Use Case |
|---|---|---|---|
| Fuel burning | Coal, Wood | Heat, Ash | Powering other machines |
| Slag processing | Slag | Refined materials | Recycling byproducts |
| Ice melting | Ice | Water, Steam | Creating water sources |
| Steam generation | Water, Heat | Steam | Powering steam-based machines |
The Furnace is a versatile machine that every factory needs, because it handles multiple functions that are essential for progression. Pairing the Furnace with a Hydro Sponge creates a closed-loop water management system that keeps your factory running without manual intervention. The Smelter and Furnace together form the processing backbone of any Sandustry factory, and mastering their operation is the key to efficient resource management.
Flamethrower and Rocket Launcher: Advanced Utility Machines
The Flamethrower and Rocket Launcher are the advanced utility machines in the Sandustry machines list, and they provide specialized functions that go beyond basic resource gathering and processing. The Flamethrower clears organic material and ignites fuel, while the Rocket Launcher transports payloads over long distances. Both machines require significant resources to build, so you should only invest in them after establishing a stable production base.
Flamethrower: Clearing Terrain and Managing Organic Growth
The Flamethrower requires 20 Iron and 6 Gear to build, and it projects a stream of fire that burns organic material and ignites flammable substances. Because the game simulates every pixel individually, the Flamethrower can ignite seeds, spores, and other organic particles that spread across the map. Players report that the Flamethrower is essential for controlling organic growth that can overwhelm a factory if left unchecked.
The Flamethrower is also useful for clearing large areas of vegetation quickly, which makes it ideal for preparing new construction sites. Community testing shows that the Flamethrower has a range of roughly 8 blocks, and it consumes fuel at a rate of 1 unit per second while active. The Flamethrower can also be used defensively to create fire barriers that prevent enemies or unwanted particles from entering your base.
| Utility Machine | Build Cost | Range | Fuel Consumption | Best Use Case |
|---|---|---|---|---|
| Flamethrower | 20 Iron, 6 Gear | 8 blocks | 1 unit/second | Clearing vegetation, defense |
| Rocket Launcher | 30 Iron, 15 Gear, 5 Circuit | 50+ blocks | 1 rocket/shot | Long-distance transport, demolition |
The Flamethrower requires careful handling because fire can spread to your own structures if you are not careful. Players recommend using the Flamethrower from a safe distance and keeping a Hydro Sponge nearby to extinguish any unintended fires. The Flamethrower is a powerful tool, but it requires planning and awareness to use effectively.
Rocket Launcher: Long-Distance Transport and Demolition
The Rocket Launcher is the most expensive machine in the Sandustry machines list, requiring 30 Iron, 15 Gear, and 5 Circuit to build. It launches rockets that travel long distances and deliver payloads or cause explosive damage on impact. The Rocket Launcher is essential for late-game logistics because it can transport materials across the map faster than any conveyor system.
According to community reports, the Rocket Launcher has a range of 50 or more blocks, which makes it ideal for connecting distant resource deposits to your main factory. The rocket payload can carry up to 10 units of material, and the launcher has a reload time of 3 seconds between shots. The Rocket Launcher can also be used for demolition because the explosive impact destroys terrain and structures in a small radius.
-
Transport use: Load the rocket with materials and launch it to a receiving station
-
Demolition use: Target the Rocket Launcher at unwanted structures to clear them quickly
-
Defensive use: Launch rockets at incoming threats to destroy them before they reach your base
-
Resource delivery: Connect distant mining operations to your factory with rocket transport
The Rocket Launcher is a game-changing machine that opens up new possibilities for factory design, because it removes the distance constraint that limits most production layouts. However, the high build cost means you should only invest in it after establishing a stable resource base. The Flamethrower and Rocket Launcher represent the pinnacle of the Sandustry machines list, and mastering their use is the mark of an advanced player.
Sandustry Building Guide: Placement Strategies and Layout Tips
The Sandustry buildings guide would not be complete without practical placement strategies, because machine positioning determines how efficiently your factory operates. The game's pixel-based simulation means that machine interactions depend heavily on spatial relationships, and poor placement can cause production bottlenecks or resource waste. This section covers the key layout principles that experienced players use to build efficient factories.
Optimizing Machine Layout for Resource Flow
The most important principle in the Sandustry machines guide is resource flow optimization, which means arranging machines so that materials move naturally from one process to the next. Players recommend placing the Grabber at the highest point of your factory and letting gravity carry materials downward through the production chain. This approach minimizes the need for conveyor systems and reduces power consumption.
The table below shows the recommended machine order for a basic production line:
| Production Stage | Recommended Machine | Position | Purpose |
|---|---|---|---|
| 1. Collection | Grabber | Highest point | Gather raw materials |
| 2. Storage | Storage Silo | Below Grabber | Buffer material supply |
| 3. Processing | Smelter | Below storage | Convert ore to bars |
| 4. Refining | Furnace | Below smelter | Process slag and generate heat |
| 5. Distribution | Rocket Launcher | Lowest point | Transport finished goods |
The Grabber should always be placed above the storage silo so that collected materials fall directly into storage without requiring additional transport. The Smelter should sit below the storage silo so it can pull materials automatically, and the Furnace should be positioned to receive slag from the Smelter. This vertical arrangement creates a gravity-fed production line that runs with minimal power consumption.
Common Layout Mistakes and How to Avoid Them
Many new players make the mistake of placing machines too close together, which can cause interference because the simulation treats every pixel individually. The Hydro Sponge placed too close to a Furnace will absorb the water that the Furnace needs for steam generation, which disrupts both machines. Players recommend keeping at least 2 blocks of space between machines that interact with different materials.
Another common mistake is placing the Flamethrower near flammable storage, which can cause catastrophic fires that destroy your entire factory. Community reports suggest that the Flamethrower should be positioned at least 10 blocks away from any storage containing coal, wood, or other flammable materials. The Rocket Launcher also requires careful placement because its explosive impact can damage nearby structures if aimed incorrectly.
| Common Mistake | Consequence | Prevention |
|---|---|---|
| Machines too close together | Material interference | Keep 2+ blocks between machines |
| Flamethrower near storage | Fire destruction | Maintain 10+ block safety distance |
| Rocket Launcher aimed at base | Structural damage | Aim away from your own buildings |
| Hydro Sponge near Furnace | Steam production loss | Separate water and heat systems |
The best approach is to plan your factory layout on paper or in a sandbox mode before committing to construction, because moving machines after placement is expensive and time-consuming. For a deeper dive into which machines deserve priority upgrades, check out our best machines guide that ranks every building by overall value. You should also review our tool guide for detailed instructions on using the Flamethrower and Rocket Launcher effectively.
Machine Synergy Combos
Once you master the basics of the Sandustry machines list, you can start exploring advanced strategies that combine multiple machines for maximum efficiency. The game's physics simulation creates opportunities for synergies that are not obvious at first glance, and experienced players have discovered several powerful combinations. This section covers the most effective machine synergies and advanced building strategies.
Creating Self-Sustaining Production Loops
The most powerful strategy in the Sandustry machines guide is creating self-sustaining production loops, where the output of one machine feeds the input of another without any player intervention. The classic example involves the Furnace melting ice into water, the Hydro Sponge collecting that water, and the water being used to cool the Furnace or generate steam. This closed-loop system requires no external input once established.
According to community data, a well-designed production loop can run indefinitely without maintenance, which frees up your time to focus on expanding your factory. The key is to balance the production rates of each machine so that no single machine becomes a bottleneck. The table below shows the recommended machine ratios for common production loops:
| Production Loop | Machines Involved | Optimal Ratio | Output |
|---|---|---|---|
| Water recycling | Furnace + Hydro Sponge | 1:1 | Continuous water supply |
| Ore processing | Grabber + Smelter + Furnace | 2:1:1 | Refined metal bars |
| Organic fuel | Grabber + Furnace | 3:1 | Heat and energy |
| Long-distance transport | Grabber + Rocket Launcher | 4:1 | Material delivery |
The Grabber plays a central role in most production loops because it provides the raw material input that keeps the system running. Pairing multiple Grabbers with a single processing unit can increase throughput, but you need to ensure that the processing unit can handle the increased input rate. Players report that a 2:1 ratio of Grabbers to Smelters provides optimal throughput without overloading the Smelter.
Late-Game Machine Pairings
In the late game, you will want to combine multiple advanced machines to create complex production networks. The Rocket Launcher can be paired with a receiving station that uses a Grabber to collect delivered materials, which creates a long-distance transport system that requires no conveyors. The Flamethrower can be used to clear large areas for expansion, and the cleared land can be immediately developed with new machines.
One powerful combination involves using the Hydro Sponge to create dry zones, then placing Furnaces in those zones to generate steam without interference from ambient water. The steam can then be used to power steam-based machines, creating a self-contained power generation system. Community reports suggest that this combination can generate enough power to run an entire mid-sized factory without external fuel sources.
-
Rocket transport network: Set up multiple Rocket Launchers with receiving stations for a global transport system
-
Firebreak defense: Use Flamethrowers to create fire barriers that protect your factory from organic invasions
-
Desert reclamation: Use Hydro Sponges to dry out flooded areas, then develop them with new machines
-
Steam power grid: Combine Furnaces and Hydro Sponges to create a self-sustaining power system
For players who want to push their factory to the limits, our advanced machines guide covers the most complex building combinations and optimization techniques. You should also review our factory buildings guide for detailed information on production building setups and machine placement strategies.
Frequently Asked Questions
What is the best starting machine in the Sandustry machines list?
The Grabber is the best starting machine because it provides passive resource collection with minimal cost and setup. Building two Grabbers early gives you a steady supply of sand and organic materials, which you can use to fuel your first Smelter and Furnace. Prioritize upgrading your Grabbers before investing in advanced machines.
How do I unlock the Rocket Launcher in Sandustry?
The Rocket Launcher unlocks in the late game after you research circuits and advanced manufacturing. You need to build a research station and complete the circuit research tree, which requires significant iron and gear production. Once unlocked, the Rocket Launcher costs 30 Iron, 15 Gear, and 5 Circuit to build.
Can the Hydro Sponge remove all water from a flooded area?
The Hydro Sponge can remove water gradually, but it has a limited internal storage capacity that requires periodic emptying. Placing multiple Hydro Sponges at the lowest points of a flooded area speeds up the drying process significantly. According to community testing, three Hydro Sponges can dry a medium-sized flooded area in about two minutes.
Is the Flamethrower worth building for early-game defense?
The Flamethrower is not recommended for early-game defense because its high build cost and fuel consumption make it inefficient for new players. Instead, focus on building Grabbers and Smelters to establish your resource base first. The Flamethrower becomes valuable in the mid-game when organic growth becomes a serious problem.
What is the most efficient machine layout for a beginner factory?
The most efficient beginner layout stacks the Grabber above a storage silo, feeding a Smelter and Furnace below. This gravity-fed vertical design cuts conveyor use and power draw. Leave two blocks between machines to avoid jams. Prioritize the Grabber first—it unlocks every other Sandustry machine’s input flow.