
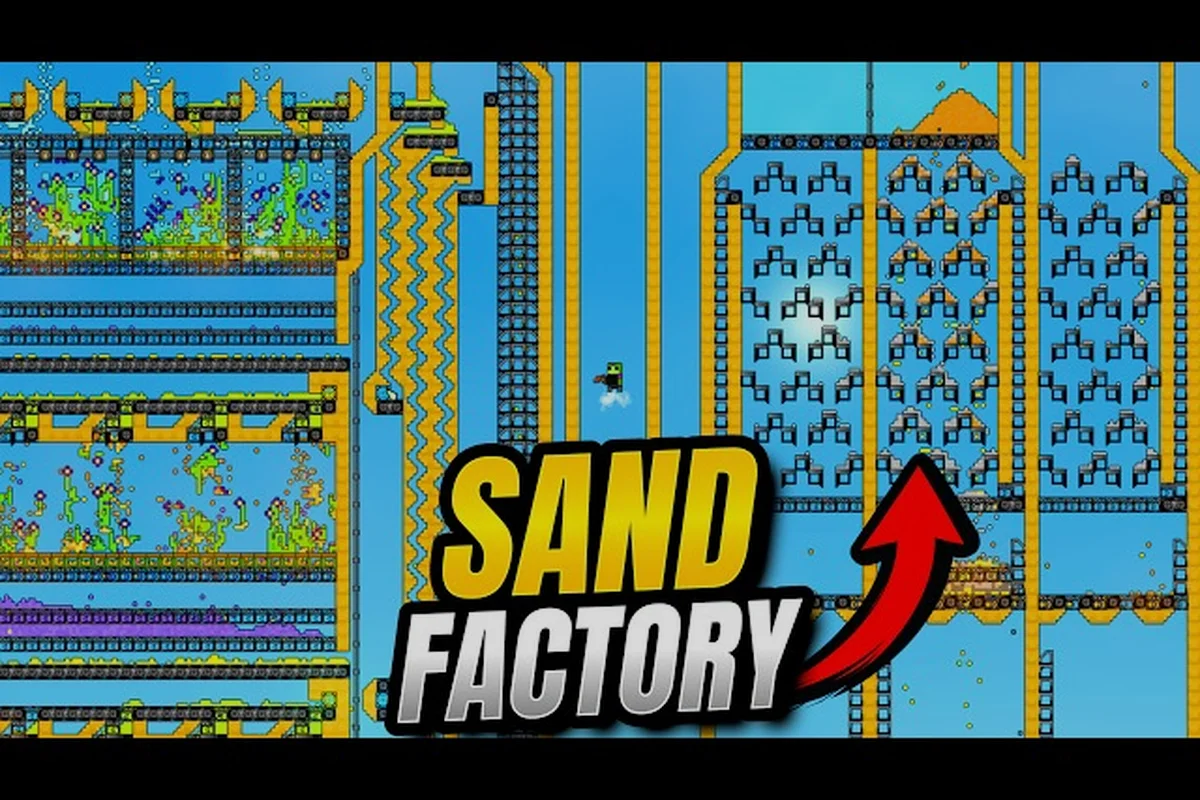
The Sandustry pipe system is the backbone of any serious fluid automation setup, yet most players hit their first wall the moment water needs to travel more than a few tiles. Because every pixel in Sandustry simulates independently — sand absorbs moisture, ice melts into water, and steam rises to condense into rain — fluids behave with a physical fidelity that punishes sloppy routing. Getting your Sandustry pipe system right from the start saves hours of debugging later, and it directly determines whether your early factory thrives or stalls.
What makes this worth your attention right now is that fluid handling sits at the intersection of every mid-game milestone: cooling, washing, steam generation, and even seed hydration for automated farms. If you route water inefficiently, every downstream machine suffers. This guide walks through pump placement, pressure management, filter logic, and the exact pipe layouts that keep water flowing without leaks or clogs. By the end, you will have a mental model for designing Sandustry fluid automation that scales from a single well to a full production district.
Understanding the Sandustry Pipe System Fundamentals
The Sandustry pipe system operates on principles that feel closer to real fluid dynamics than to typical factory-game conveyor logic. Water does not teleport from source to destination; it moves pixel by pixel, responding to gravity, pressure, and the materials around it. This means a pipe network is only as good as its pressure gradient, and a poorly sealed line will bleed water into surrounding sand faster than you can pump it out. Before laying your first pipe, you need to internalize three core behaviors that community testing has repeatedly confirmed as of the 2026 builds:
-
Water seeks the path of least resistance — it will always prefer an open channel over a pressurized pipe, so unsealed junctions cause immediate losses.
-
Sand absorbs surrounding water — the official Steam description notes that sand depletes reservoirs, which means buried pipes in dry terrain slowly lose fluid to the environment.
-
Steam rises and condenses — when water boils, it becomes steam that climbs upward and can rain back down, so vertical routing needs venting or condensation management.
These mechanics create a clear hierarchy of priorities when you design your network. First, seal everything. Second, maintain consistent pressure. Third, plan for phase changes if you are working near heat sources. Players who ignore these rules end up with soggy foundations and dry machines, which is why the Sandustry pipe system demands more forethought than a simple belt line.
The good news is that the simulation rewrite showcased in the official development videos — where water flows, ice melts, and steam cycles through evaporation and rainfall — means the system is deterministic once you understand it. You can predict exactly where water will go if you control the variables. That predictability is your friend when scaling up.
Core Components of a Functional Network
Every functional network relies on four building blocks, and each one serves a distinct role that cannot be substituted by another:
-
Pumps — these generate the pressure differential that moves water from a source (lake, well, or reservoir) into your pipe network. A pump without proper intake coverage will cavitate and deliver inconsistent flow.
-
Pipes — the sealed channels that carry water between points. Their material and orientation affect flow rate, with longer runs requiring more pressure to maintain the same throughput.
-
Filters — these separate mixed fluids or block unwanted materials from entering sensitive machinery. A Sandustry filter setup is essential when your water source carries debris or when you recycle steam condensate.
-
Valves and junctions — these control direction and flow rate, letting you balance multiple branches off a single main line without starving any one consumer.
The interaction between these components defines your network's efficiency. For example, a pump feeding a long horizontal line needs more head pressure than one feeding a short vertical drop, because gravity assists downward flow but fights upward movement. Understanding these tradeoffs lets you place pumps where they do the most good rather than where they fit conveniently.
Designing Your Sandustry Pump Setup for Maximum Flow
A well-executed Sandustry pump setup is the difference between a factory that hums along and one that sputters every time you expand. The pump is the heart of your fluid network, and its placement, orientation, and intake configuration determine how much water you can push through your pipes at any given moment. Most early-game frustration traces back to pumps that are technically connected but functionally starved.
The first rule of pump placement is to ensure the intake sits in a body of water deep enough to avoid drawing air. In Sandustry, water is simulated as individual pixels, so a shallow puddle will deplete faster than your pump can refill it, causing intermittent flow that wreaks havoc on downstream machines. Community reports suggest that a pump intake needs at least a 3x3 area of water at least two pixels deep to sustain continuous operation without cavitation.
The second rule concerns pressure. A single pump can push water a limited distance before friction and gravity overcome its output pressure. Based on player testing, a standard pump maintains reliable flow for roughly 20-30 tiles of horizontal pipe before you notice a drop in throughput. Beyond that distance, you need either a booster pump mid-line or a gravity-fed elevation advantage.
| Pump Configuration | Max Reliable Distance | Best Use Case | Pressure Drop |
|---|---|---|---|
| Single pump, horizontal line | 20-30 tiles | Short runs from a nearby well | Low |
| Single pump, vertical lift | 8-12 tiles | Moving water up one floor | High |
| Pump + mid-line booster | 50-60 tiles | Long factory-wide distribution | Moderate |
| Gravity-fed from elevated tank | Unlimited (with head) | Main reservoir feeding multiple branches | Minimal |
The table above reflects community-tested values as of the 2026 builds, and they hold up well across most map seeds. If you find yourself exceeding these distances, the answer is not to add more pumps blindly but to rethink your routing. A central elevated reservoir that feeds downward branches will outperform a dozen inline pumps fighting friction on a flat plane.
Pressure Management and Booster Placement
Pressure management is the art of knowing when to add a booster and where to put it. The key insight is that boosters do not create water; they restore pressure that friction has consumed. Placing a booster too close to the source wastes its potential, while placing it too far means the line has already stalled and the booster cannot recover the flow.
The optimal strategy, according to player experience, is to place boosters at roughly 60-70 percent of the maximum reliable distance. For a standard pump with a 25-tile effective range, that means a booster around tile 15-17. This gives the booster enough remaining line to push water the rest of the way while ensuring the flow never fully stalls. You can chain this pattern indefinitely for long factory runs, though each booster adds a small power draw to your grid.
Vertical routing deserves special attention because gravity works both for and against you. Pumping water upward costs roughly three times the pressure of pumping horizontally, which is why the effective vertical range is so much shorter. If you need water on an upper floor, the most efficient approach is to pump into an intermediate tank on the ground floor, then use a dedicated lift pump to push from that tank to the upper level. This isolates the vertical challenge and prevents pressure drops from affecting your entire network.
Building an Efficient Sandustry Filter Setup
A proper Sandustry filter setup keeps your fluid network clean and your machines running at peak efficiency. Filters serve two primary purposes: removing contaminants from raw water sources and separating mixed fluids when you recycle byproducts. Both use cases become critical as your factory grows and your water demands increase.
The most common filtration need arises when you draw water from natural sources like ponds or rivers. These bodies often contain sand, seeds, spores, or other debris that the pixel simulation carries along with the water. If that debris reaches your machines, it can clog intakes, contaminate outputs, or simply reduce the effective flow rate. A filter placed immediately after the pump intake catches these materials before they enter your main line.
| Filter Type | Removes | Best Placement | Maintenance |
|---|---|---|---|
| Coarse screen | Sand, large debris | Directly after pump intake | Low — occasional clearing |
| Fine mesh | Seeds, spores, small particles | Before sensitive machinery | Medium — periodic replacement |
| Phase separator | Steam, gas bubbles | At condensation points | High — needs regular venting |
| Chemical filter | Dissolved impurities | End of line, before final use | Low — long lifespan |
The table above outlines the four filter archetypes that players have identified through testing. Your Sandustry filter setup will typically combine a coarse screen at the source with a fine mesh before any machine that requires clean water. The phase separator becomes relevant only when you recycle steam, which we will cover in the advanced section.
Filter placement matters as much as filter type. Putting a fine mesh immediately after the pump seems logical, but it will clog faster because it catches everything the coarse screen would have handled. The better order is coarse first, then fine, with enough pipe distance between them to let sediment settle. This staged approach extends filter life and reduces maintenance frequency.
Filter Maintenance and Flow Optimization
Filters are not set-and-forget components; they require periodic attention to maintain flow rates. As a filter accumulates debris, its effective throughput drops, which starves downstream machines even though the pump is working fine. Players often mistake this for a pump problem and add boosters, when the real fix is simply cleaning or replacing the filter.
A good maintenance rhythm is to check filters every time you expand your factory or after any major production run. The coarse screen will need the most frequent attention because it catches the bulk of the debris. The fine mesh lasts longer but fails more dramatically when it finally clogs, so it deserves monitoring even if it seems to be working.
One advanced technique is to build a parallel filter bank — two or more filters in parallel with valves that let you isolate one for cleaning while the other carries the full flow. This keeps your network running continuously without downtime. It costs more materials upfront, but for a Sandustry auto factory that runs around the clock, the reliability gain is worth every resource spent.
Routing Strategies for Your Sandustry Conveyor System
Your Sandustry conveyor system and your pipe network are two halves of the same logistical brain, and they need to work in harmony rather than in isolation. While conveyors move solid items — ore, ingots, seeds, finished goods — pipes move fluids. The moment your production line needs both, you have to coordinate their layouts so neither blocks the other.
The most common mistake is treating pipes as an afterthought, running them wherever there is spare space. This creates spaghetti networks that are hard to debug, hard to expand, and prone to accidental disconnection when you build new structures nearby. A better approach is to plan dedicated utility corridors that carry pipes, conveyors, and power lines in parallel, with clear separation so each system can be serviced independently.
| Layout Pattern | Pipe Efficiency | Conveyor Compatibility | Expansion Ease | Recommended Use |
|---|---|---|---|---|
| Shared corridor | Medium | High | Medium | Compact factories with limited space |
| Separate floors | High | High | High | Large facilities with vertical room |
| Ring main | Very High | Medium | High | Distributed production across a wide area |
| Point-to-point | Low | Very High | Low | Simple setups with few consumers |
The ring main pattern deserves special attention because it solves the pressure distribution problem elegantly. Instead of a single line that branches off to each consumer, a ring main loops around your factory with consumers tapping off at various points. Water can flow in both directions around the ring, which means a heavy draw at one end does not starve consumers at the other end. This is the pattern used by real-world municipal water systems, and it translates perfectly to Sandustry.
Integrating Pipes with Conveyor Lines
When you integrate pipes with conveyor lines, the key is to establish crossing points that do not interfere with either system. Pipes can pass under or over conveyors if you build the right support structures, but the crossing point becomes a potential bottleneck if not designed carefully. Players recommend keeping at least one tile of vertical separation between pipe and conveyor at crossings, so neither system blocks access to the other.
Another integration consideration is machine placement. Machines that consume both solids and fluids — such as a washer that takes ore and water — need both inputs accessible. The pipe should approach from one side and the conveyor from another, creating a clean input zone that does not force you to route one system through the other. This sounds obvious, but many players discover the problem only after building a machine that is unreachable on one side.
For a deeper look at how conveyors handle solid logistics alongside your fluid network, the Sandustry conveyor belts guide covers belt routing, throughput, and merge logic in detail. Pairing that knowledge with the pipe strategies here gives you a complete logistics picture.
Scaling to a Sandustry Auto Factory with Fluid Automation
When you scale from a manual workshop to a Sandustry auto factory, the Sandustry fluid automation requirements change fundamentally. A small setup can tolerate occasional flow interruptions because you are there to fix them. An automated factory cannot — it needs consistent, predictable fluid delivery around the clock, or the entire production chain stalls.
The first scaling principle is redundancy. Critical pumps should have backups, and critical pipe runs should have alternate paths. If a pump fails in a small setup, you notice and fix it. In an automated factory, a failed pump can cascade through the entire production line before you even see the alert. Building redundancy costs more upfront but pays for itself the first time a component fails.
The second principle is buffering. Every consumer machine should have a small buffer tank between it and the main line. This tank absorbs short-term fluctuations in supply and demand, so a brief pressure drop in the main line does not immediately starve the machine. Buffer tanks also give you a visual indicator of flow health — if a buffer is consistently low, you know that section of the network needs attention.
| Automation Stage | Pipe Complexity | Pump Count | Filter Count | Buffer Tanks |
|---|---|---|---|---|
| Starter workshop | 1-2 lines | 1-2 | 1 | 0-1 |
| Single production block | 3-5 lines | 3-5 | 2-3 | 2-4 |
| Multi-block facility | 8-12 lines | 8-15 | 5-8 | 6-10 |
| Full auto factory | 15+ lines | 20+ | 10+ | 15+ |
The table above gives rough scaling targets based on community reports from large factories. These numbers are not hard rules, but they give you a sense of how your infrastructure needs to grow as your production expands. The key takeaway is that fluid infrastructure scales superlinearly — doubling your production more than doubles your pipe and pump requirements, because you also need redundancy and buffering.
Advanced Fluid Automation Techniques
Once your basic network is solid, several advanced techniques can push your Sandustry fluid automation to the next level. These techniques come from players who have built large-scale factories and shared their findings in community discussions. Steam recovery is the most impactful advanced technique. When water boils, it becomes steam that rises and can be captured and condensed back into water. In a factory with significant heat generation, this recovered water can offset a substantial portion of your intake needs. The catch is that steam recovery requires careful venting and condensation management, which is where a phase separator filter becomes essential.
Pressure-based priority routing lets you ensure critical consumers always get water first. By placing valves that open at specific pressure thresholds, you can create a network where essential machines draw water before non-essential ones. This is more complex to build but prevents the frustrating situation where a decorative fountain starves your ore washer.
Multi-source merging allows you to draw from multiple water sources into a single network, increasing total capacity and providing natural redundancy. If one source depletes or becomes contaminated, the others continue supplying. The challenge is balancing the sources so that no single pump fights against another — which requires check valves or careful pressure matching.
For players just starting their automation journey, the Sandustry automation guide for beginners provides a solid foundation before you tackle these advanced fluid techniques. And once your fluid network is running, the production line setup guide helps you organize the machines that consume all that water.
Troubleshooting Common Pipe System Failures
Even with careful planning, pipe systems fail. The difference between a frustrating failure and a quick fix is knowing what to look for. This section covers the most common failure modes reported by players, along with their typical causes and solutions.
Symptom: Machine runs dry but pump is running. This usually means the pump is cavitating — drawing air instead of water. Check the intake area for depletion, and verify that the water source is deep enough. If the source is fine, check for a blockage between pump and machine, which could be a clogged filter or a collapsed pipe segment.
Symptom: Water leaks into surrounding terrain. This means a pipe segment is unsealed or damaged. In Sandustry, sand absorbs surrounding water, so a small leak can drain a significant reservoir over time. Inspect your pipe runs for gaps, especially at junctions and corners where connections are easy to miss.
Symptom: Flow rate drops over time. This is almost always a filter clog. As filters accumulate debris, their throughput decreases. Check your filters first, then look for sediment buildup in low points of your pipe runs where debris can settle.
| Symptom | Likely Cause | Quick Check | Solution |
|---|---|---|---|
| Dry machine, pump running | Cavitation or blockage | Inspect intake depth | Deepen source or clear blockage |
| Terrain saturation | Unsealed pipe | Check junctions and corners | Rebuild connections |
| Gradual flow drop | Clogged filter | Inspect filter condition | Clean or replace filter |
| Intermittent flow | Air in line | Look for bubbles in clear pipes | Bleed air or add vent |
| Low pressure at distance | Friction loss | Measure flow at midpoint | Add booster pump |
The table above summarizes the most common failure modes and their first-line fixes. Most pipe system problems are mechanical rather than systemic — a specific segment or component that needs attention rather than a fundamental design flaw. Systematic troubleshooting saves time compared to randomly rebuilding sections.
Preventing Failures Through Design
The best fix is prevention, and most pipe system failures trace back to design choices made early in construction. Sealing every connection, placing filters where they are accessible, and building in test points where you can measure flow all contribute to a network that rarely fails and is easy to debug when it does.
One preventive measure that players swear by is building a flow meter into your main line. A simple transparent pipe section lets you visually confirm water is moving and gives you an early warning of flow degradation. This costs almost nothing but provides constant visibility into your network's health.
Another preventive measure is documenting your network. When you build a complex pipe system, sketch out the layout or take screenshots at each stage. When something fails months later, that documentation helps you trace the problem quickly instead of dismantling sections to find the fault.
Frequently Asked Questions
What is the best way to start a Sandustry pipe system?
Begin with a single pump drawing from a deep water source, feeding a short sealed line to your first consumer. Keep the initial run under 20 tiles to avoid pressure issues, and place a coarse filter right after the pump intake. This minimal setup teaches you the fundamentals before you scale.
How do I fix low water pressure in my Sandustry pipe system?
Low pressure usually means friction loss over distance or a clogged filter. Check filters first, then measure flow at the midpoint of your line. If flow is fine at the midpoint but low at the end, add a booster pump at roughly 60-70 percent of the line length to restore pressure.
Can I use the Sandustry pipe system for gases like steam?
Yes, the pipe system handles steam, but it requires different considerations than liquid water. Steam rises, so vertical routing works in your favor, and you need phase separators to condense steam back into water. Venting is also essential to prevent pressure buildup that can rupture pipes.
How often should I clean filters in my Sandustry filter setup?
Cleaning frequency depends on your water source quality and flow volume. A coarse screen near a sandy source may need attention every few hours of operation, while a fine mesh in clean water can last much longer. Check filters whenever you notice flow degradation, and build a parallel bank for continuous operation.
What is the ideal pipe layout for a large Sandustry auto factory?
For a large Sandustry auto factory, run a ring main with buffer tanks at each machine cluster—water flows both ways, so no line starves. Add redundant pumps and filters at junctions; this absorbs spikes and keeps production steady even if one section fails.